Torrent Compact Gaming Build
Introduction
I had wanted to move my setup into a new case for a long time, and that time has finally come. The parts will mostly stay the same; I will only change the CPU from a Ryzen 2700X to a 5700X and replace my RAM. Currently, I'm running 4x 8 GiB G.Skill Flare X, which doesn't play nicely with itself—more on this later.
Hardware
- ASUS Prime X470-Pro
- AMD Ryzen 7 5700X
- GeForce GTX 1080 Ti JetStream
- 2x 16 GiB DDR4-3600 Kingston FURY Renegade
- 2x Dynamic GP-18
- Noctua NH-D15
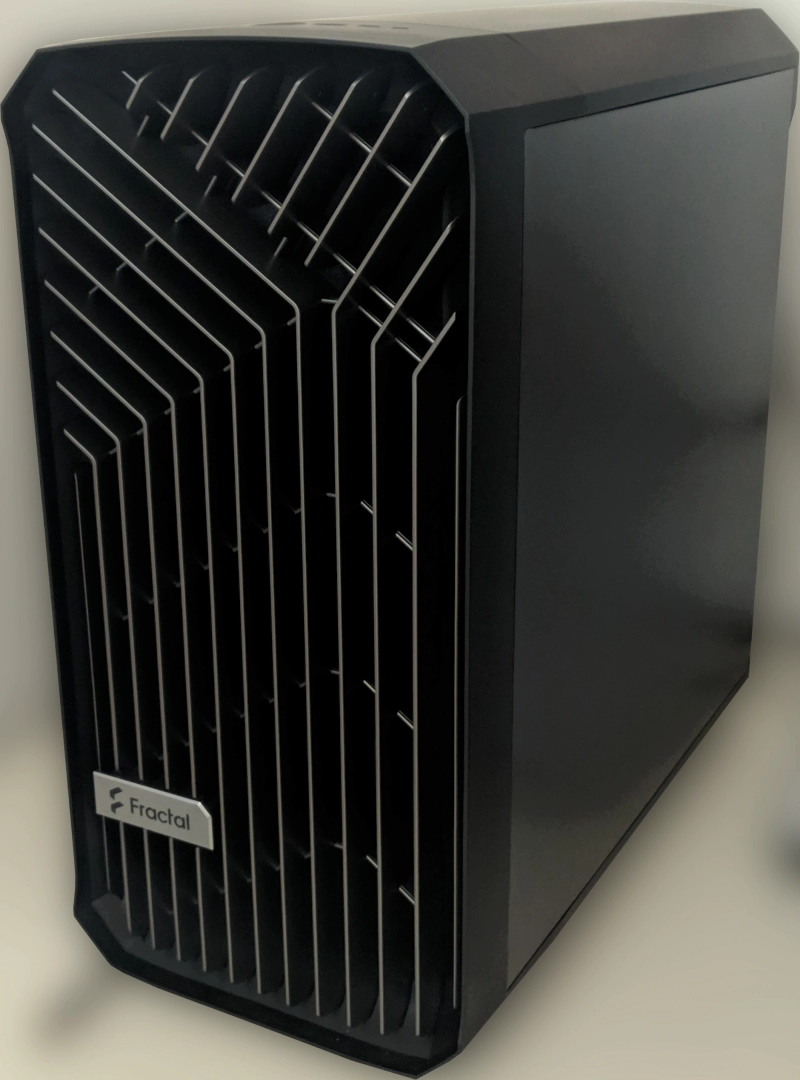
- Fractal Torrent Compact
- Seasonic Prime Ultra Gold 550W
- Crucial MX500 1TB (CT1000MX500SSD4)
- SSD 970 EVO Plus 1TB (MZ-V7S1T0BW)
Build
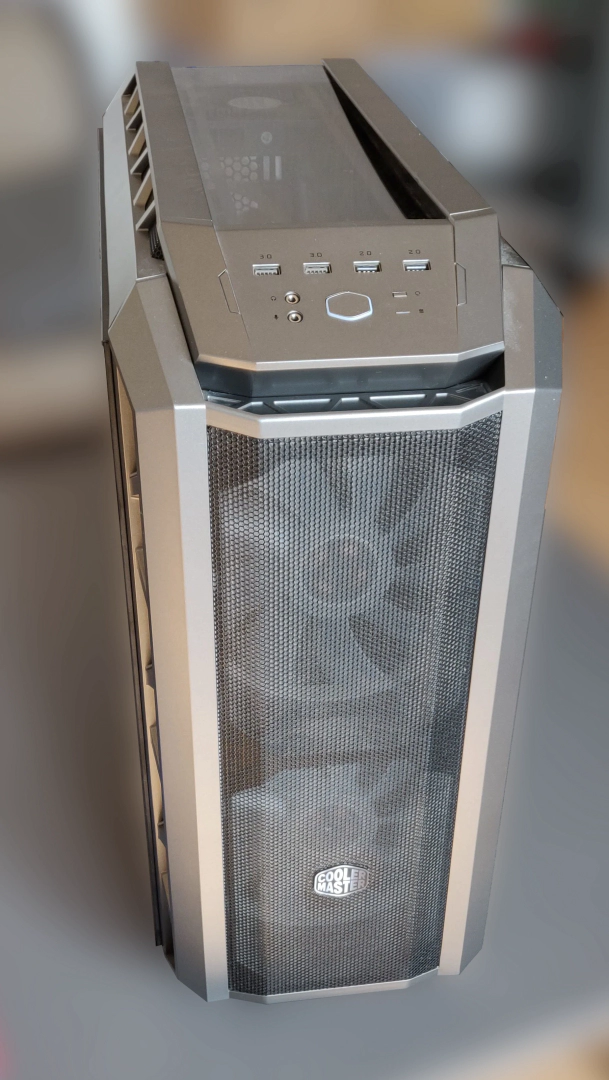
First, I needed to get everything out of the old case, which was a Cooler Master H500P.
So, let's open it up, pull everything out, and clean off the components with some compressed air.

The H500P measured (LxWxH) 544 x 242 x 542 mm, compared to the Torrent Compact's current dimensions of 450 x 222 x 467 mm. So, it is a bit smaller, a difference we will observe later when building the system. Also, the fact that the Torrent Compact mounts the PSU at the top significantly reduces clearance at the bottom.
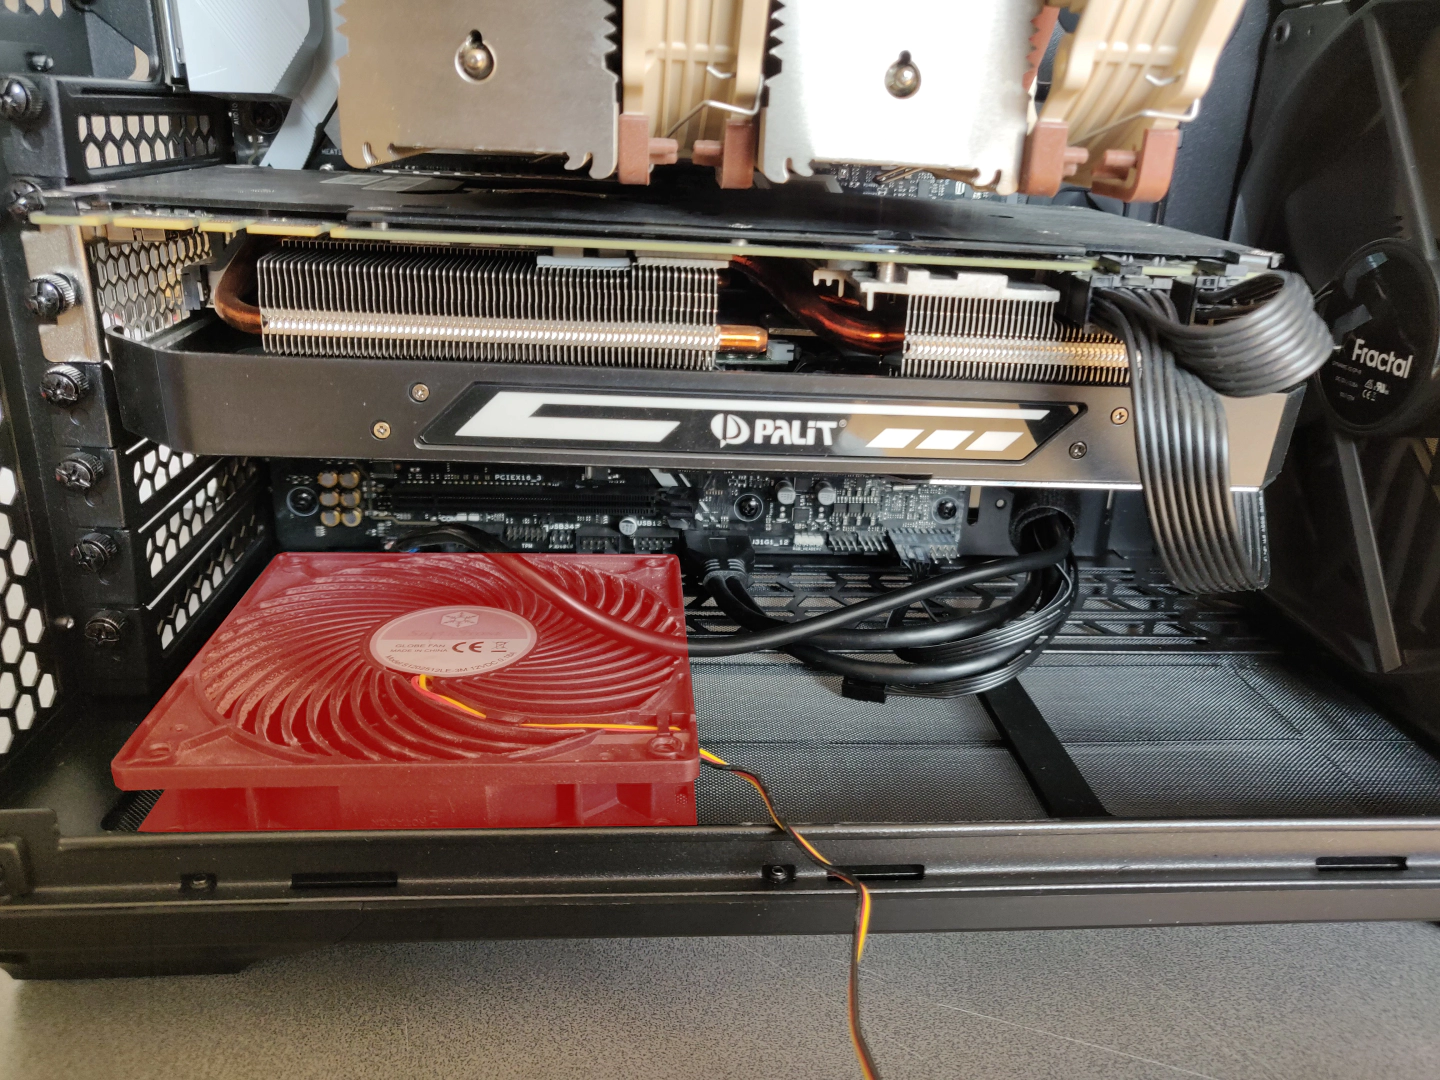
Graphics Card
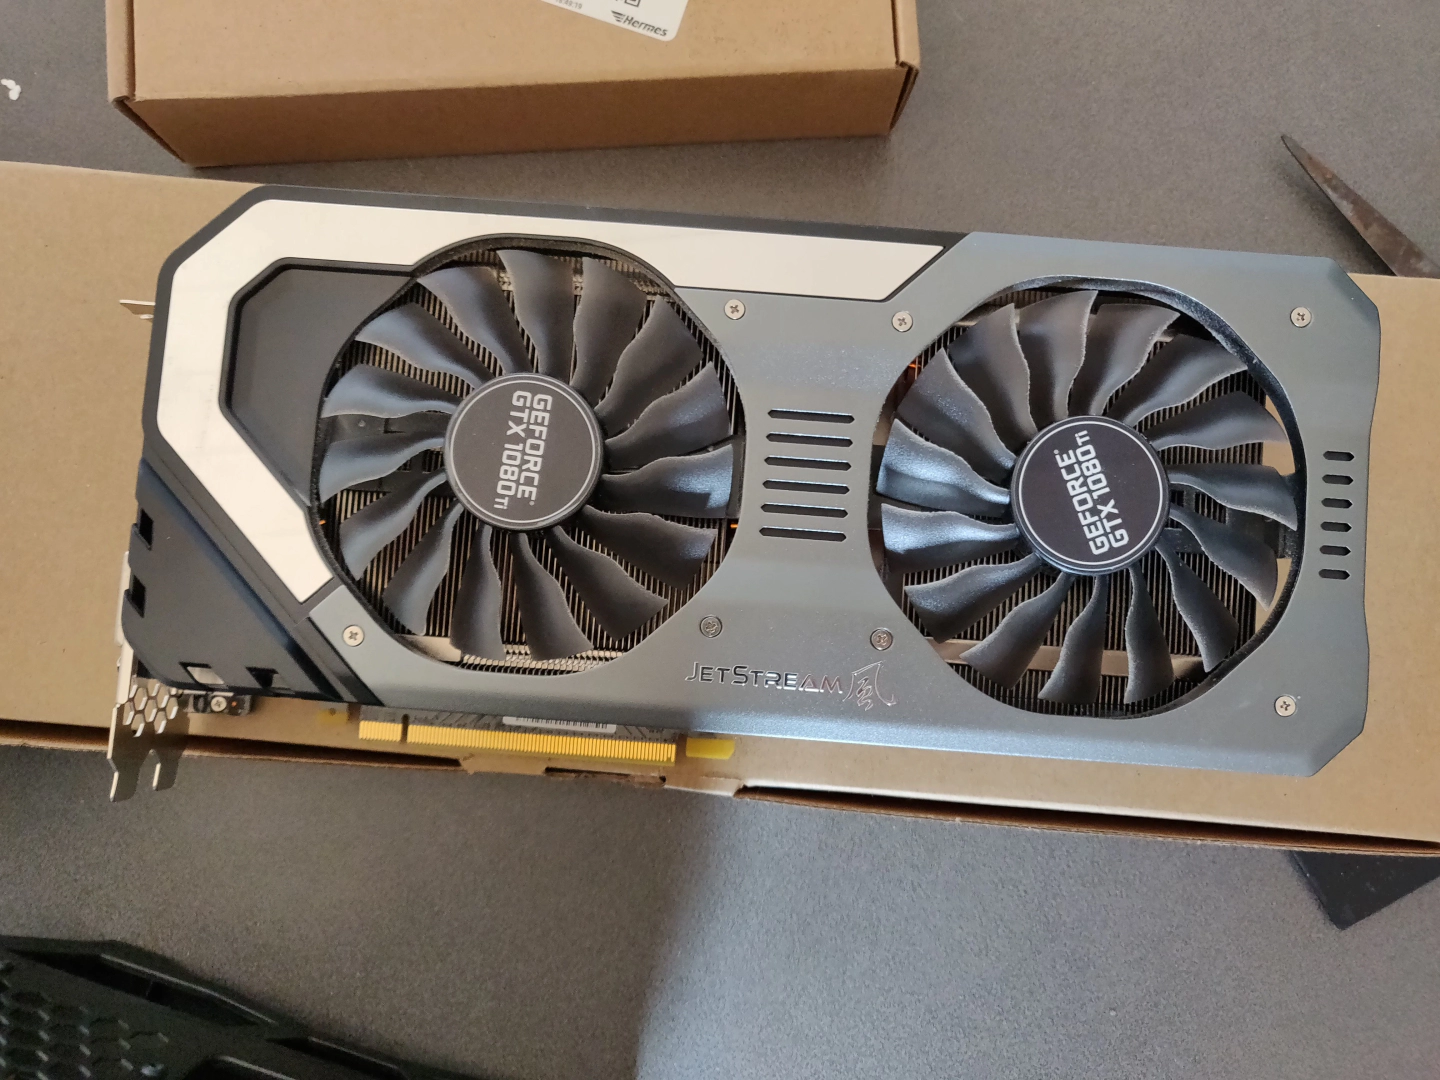
My old and trusty GTX 1080 Ti Jetstream from Palit. I bought this card used around 2018 for approximately €500 - €600 (I can't find the exact amount anymore).
Motherboard
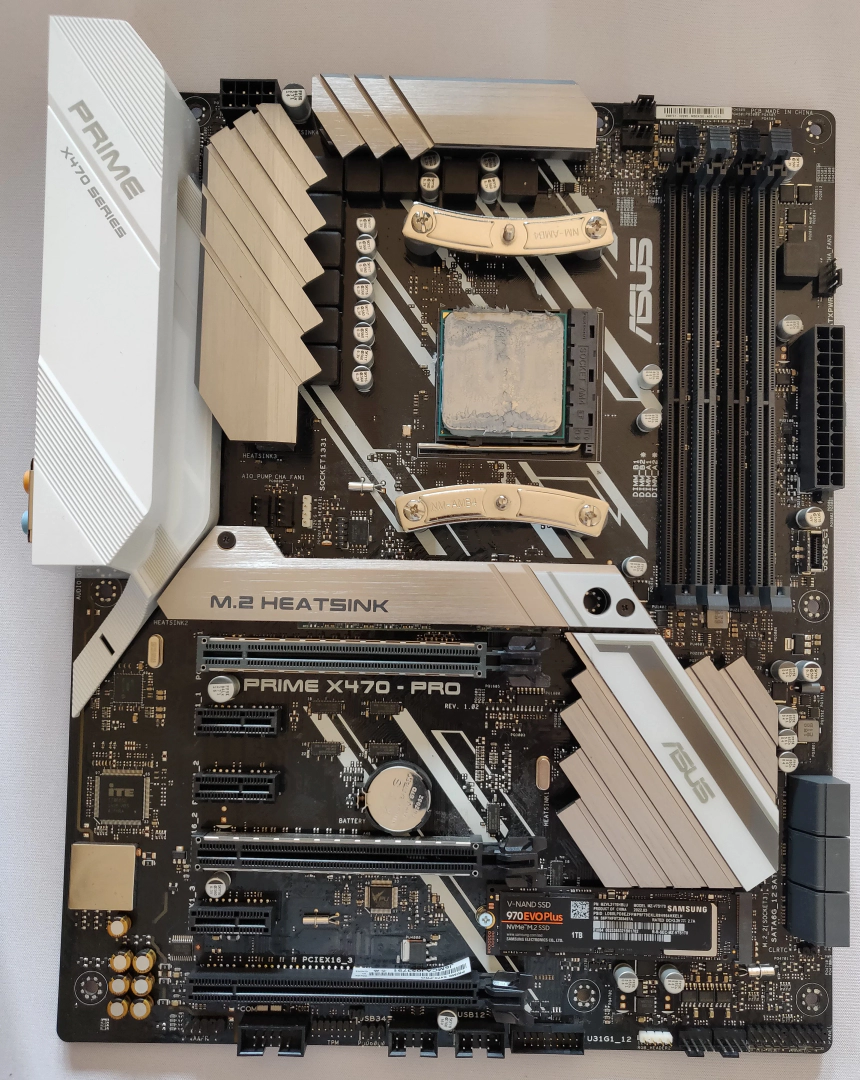
With the cooler removed from the motherboard, we can see that I might have used a bit too much thermal paste when building this PC in 2018. Will I use too much again? Well, I will try to use a bit less this time, but applying thermal paste is such an infrequent task for me that I never really get used to it.
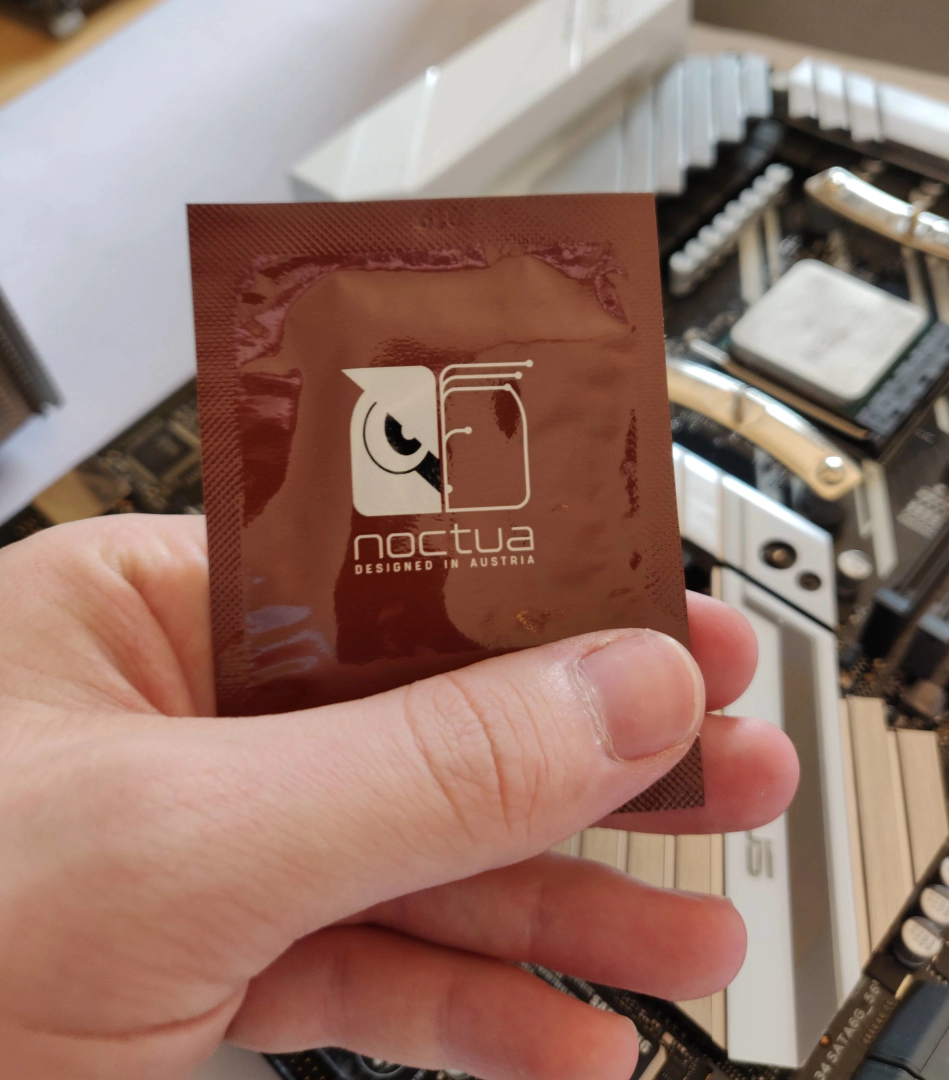
These cleaning pads, which were included with my new thermal paste from Noctua, look like condom packaging.
CPU Upgrade
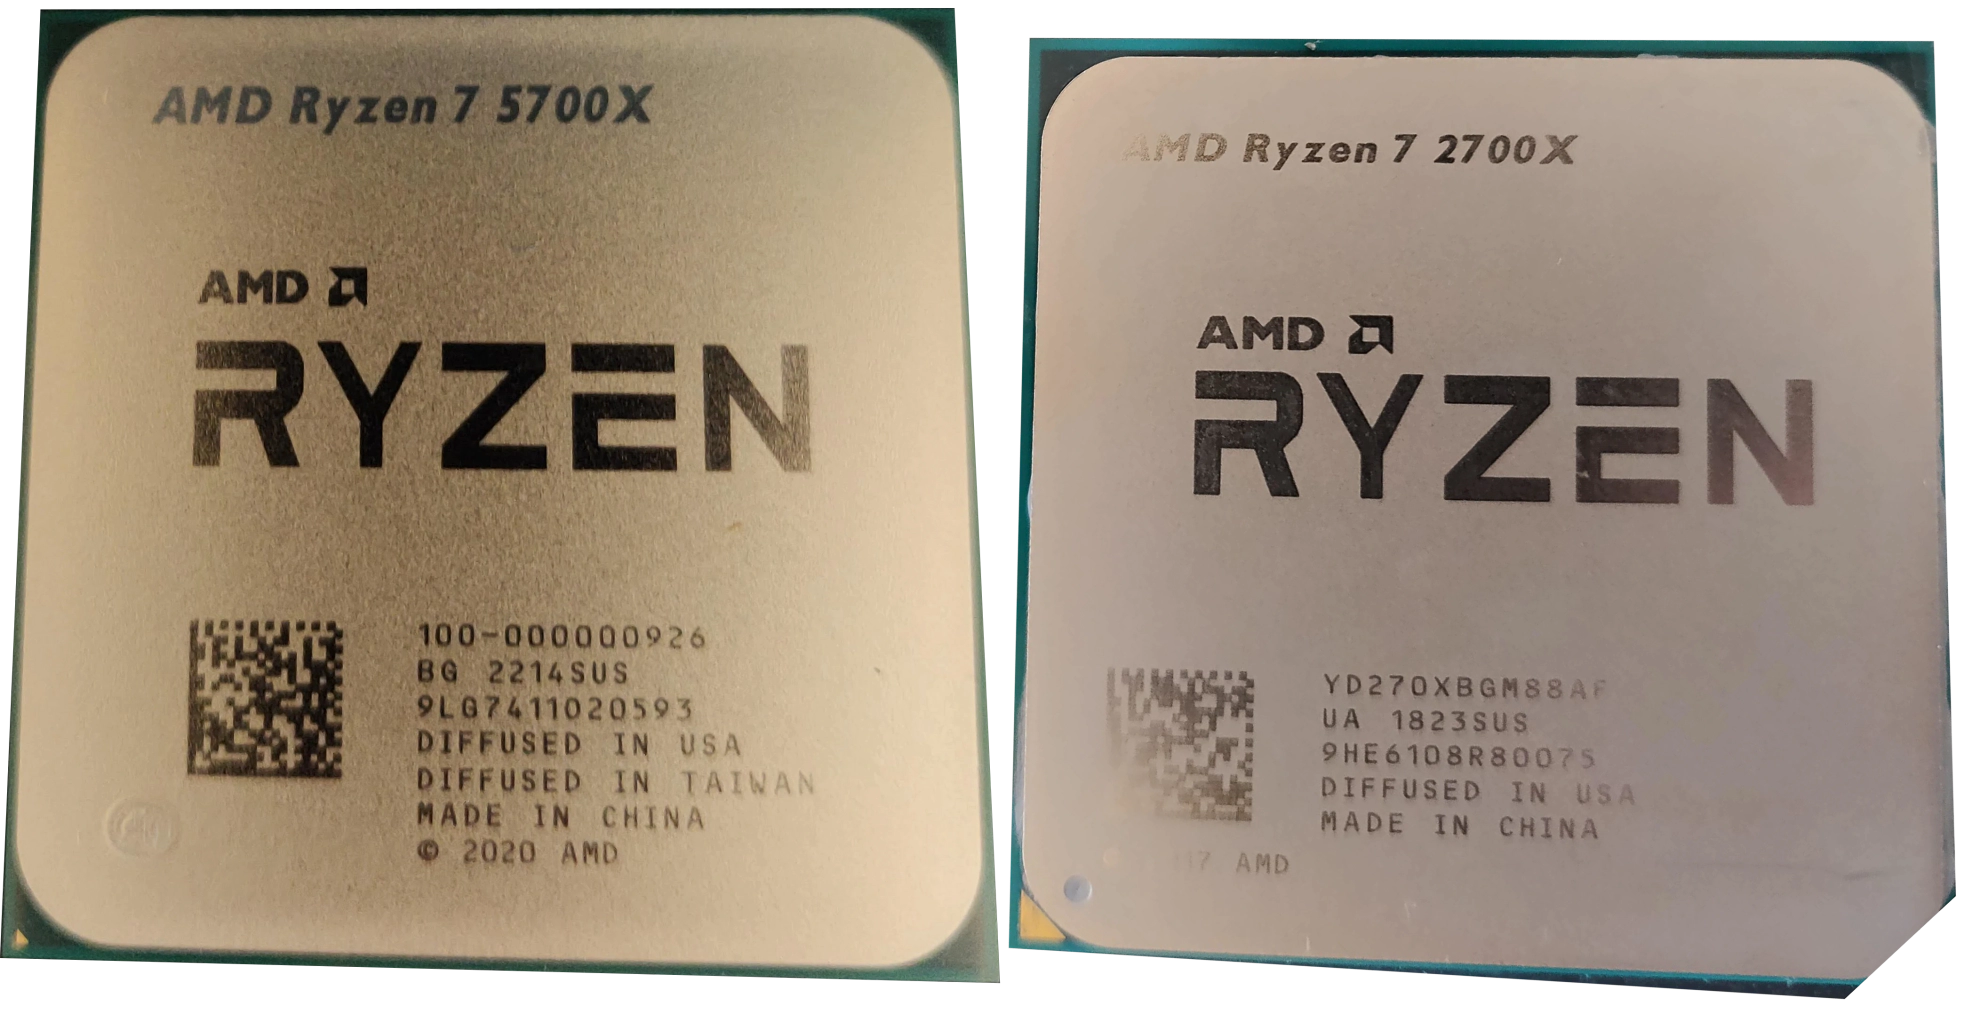
Going from a 2700X to a 5700X could be considered a waste, but I can feel the difference even when just starting Windows and opening Firefox (this could also be because of the RAM, but more on that later). I paid €250 for this one.
New RAM
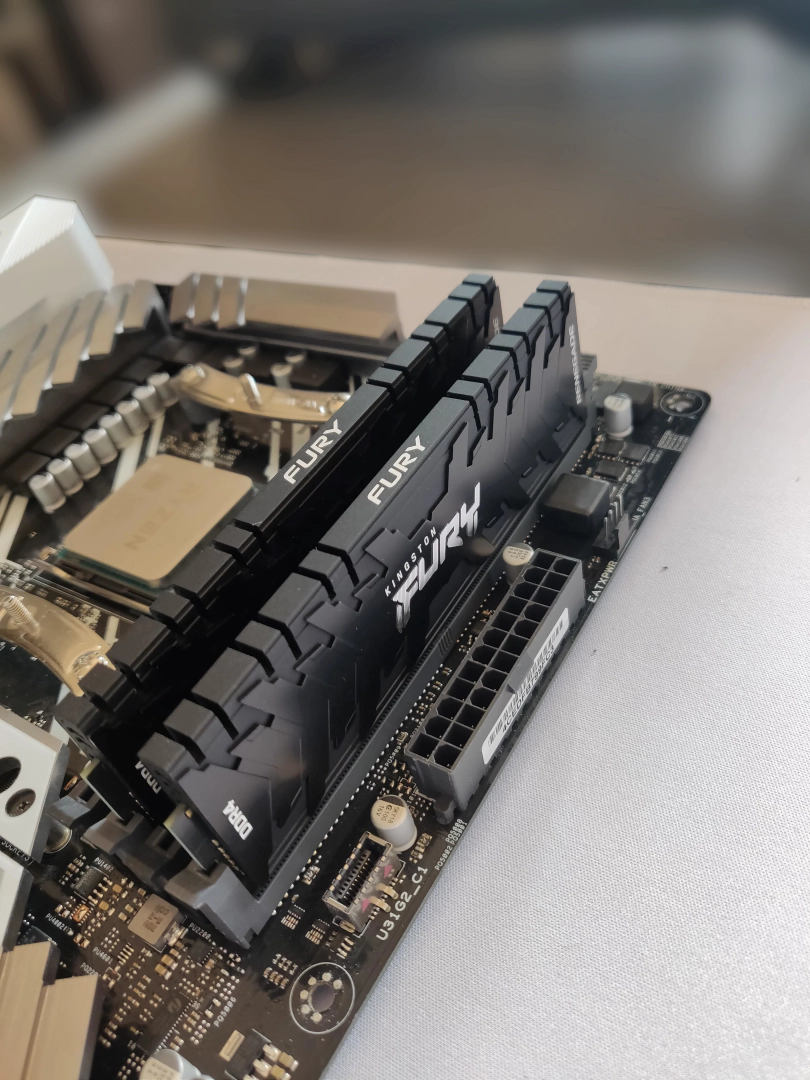
So, fuck my old RAM. I had 4x 8 GiB G.Skill Flare X sticks in my system. They should run at around 3200 MHz without problems—that's what they are rated at—but they would crash my system at random times. And yes, it IS this RAM; the problem started to appear after I added 2x 8 GiB sticks to my existing setup around 2020.
Okay, you could now blame me: "WHY didn't you buy a 4x 8 GiB set or a new 2x 16 GiB set?"
Well, now, after all the problems and random blue screens I've had, yes, I would never buy individual sticks or combine these sets again. Because even when they should theoretically work together without issues, if they don't, good luck finding the reason.
Since then, I have watched many videos about RAM, especially the videos from Actually Hardcore Overclocking - YouTube. I learned many things from them and will not make this error in the future. Also, (╯°□°)╯︵ ┻━┻ occupying all RAM slots... the memory controller on these mid-range boards often can't handle high-frequency RAM well and just gives up щ(゚Д゚щ).
So, what was the solution before not buying new RAM? Running the RAM at 1866 MHz. Yes... 1866 MHz. Noooo, not "Oh, it's DDR, so he means 3732 MHz in reality." It was genuinely 1866 MHz...
FUCK ASUS M.2 Heatsink
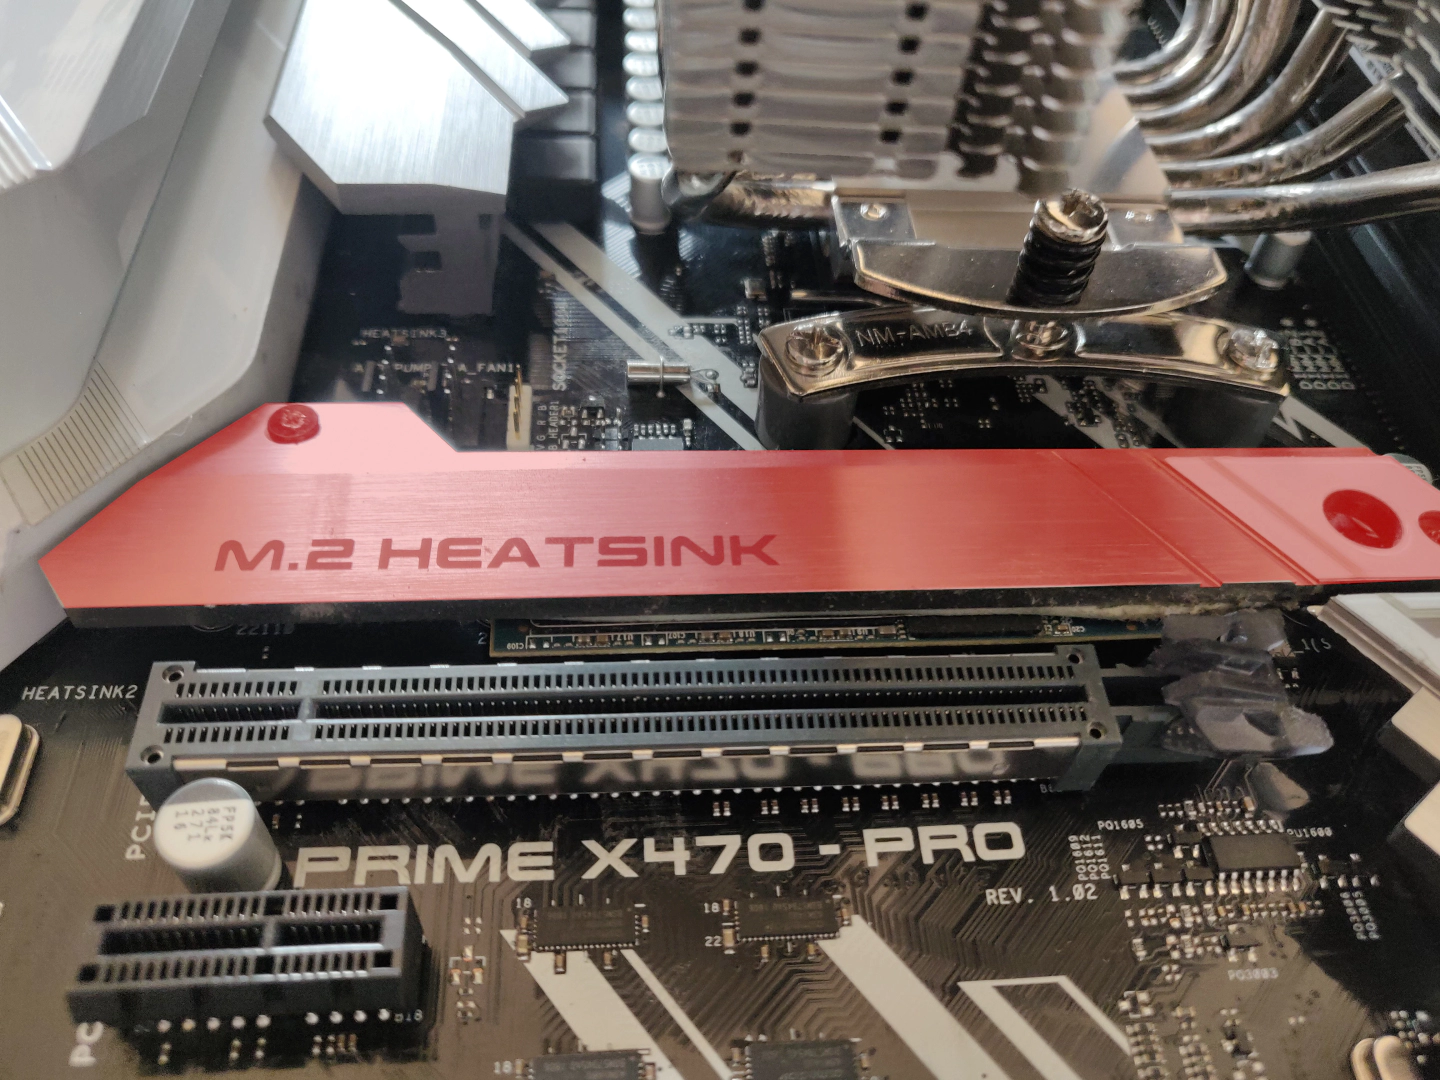
While we're at it, FUCK ASUS! HOLY SHIT, FUCK YOU SO HARD (╬ ಠ益ಠ).
This is the M.2 slot cooler for the primary M.2 SSD. Soooo, the reason I'm angry is that some cunt at ASUS thought it was a good idea to put Loctite on these small PH0 screws. Yeah, Loctite—the blue stuff that you normally use in places with a lot of vibrations to make sure a bolt or screw won't come loose on its own. This worked so fucking well here that I stripped the goddamned screw trying to get it out.
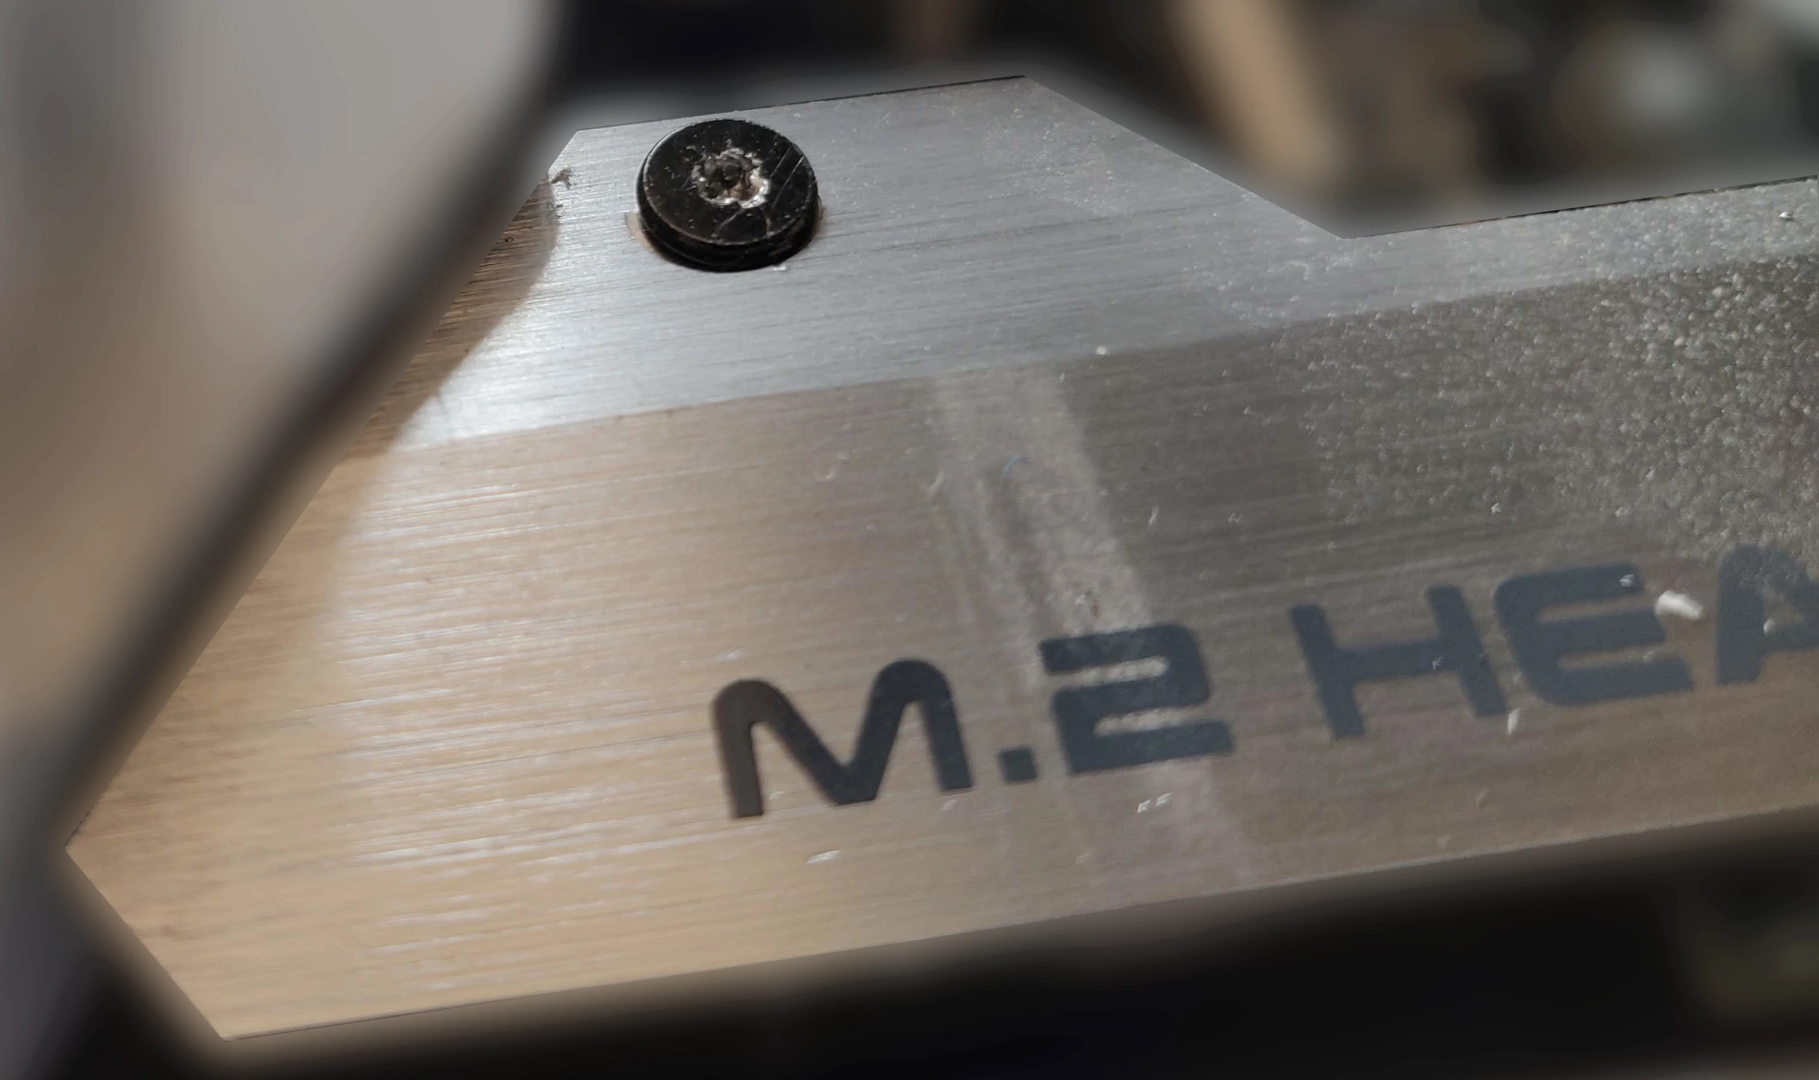
Seriously, (° ͜ʖ͡°)╭∩╮ ASUS for this! And NO, I'm not too dumb to use the right screwdriver. After going crazy over this for half an hour, I started Googling and found other people with the exact same problem.
- Example 1
- Example 2
- Example 3 different board still ASUS
- Example 4
- Example 5
- Example 6
- Example 7
- Example 8 different board still ASUS
- Example 9 different board still ASUS
Putting everything together
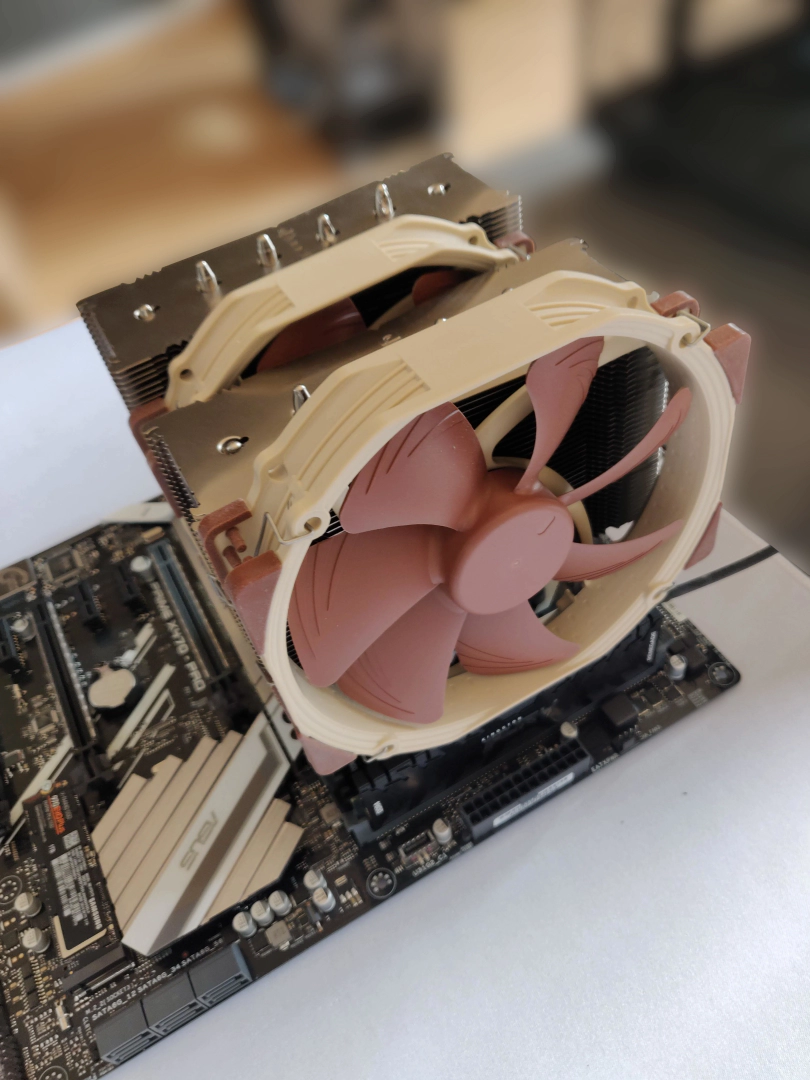
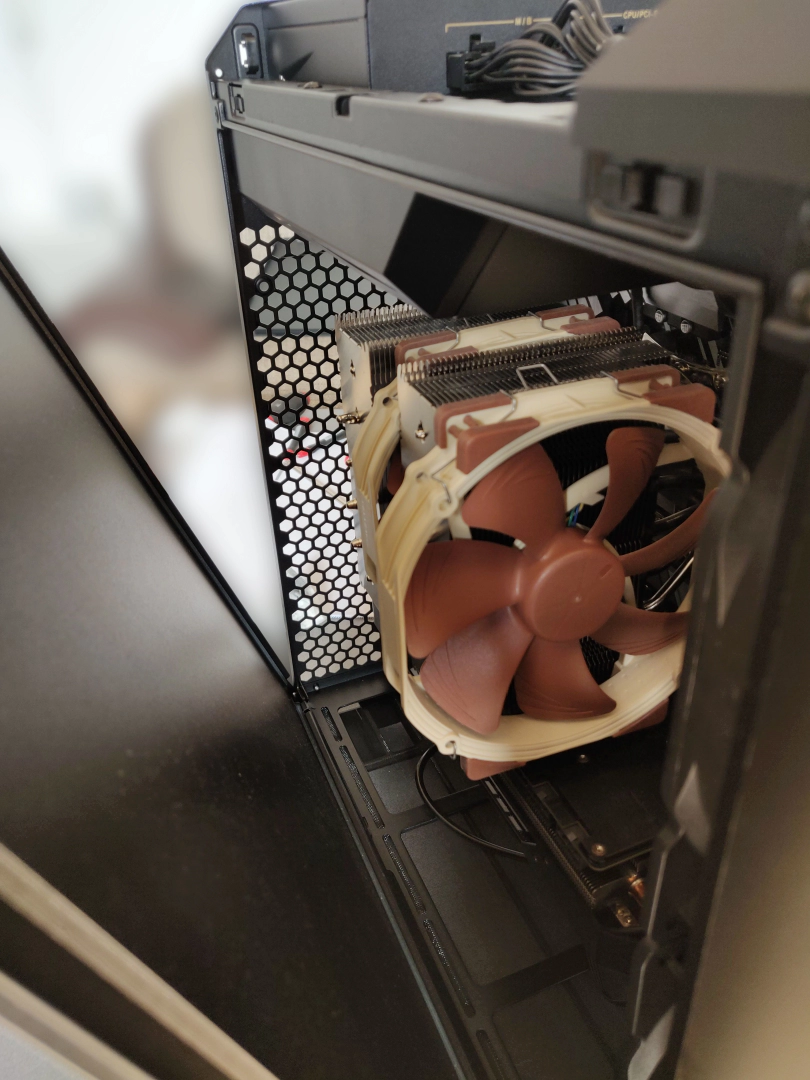
Putting the cooler back on. Yeah, it's always crazy to see how big this thing is in comparison to the rest of the board. RAM clearance is also looking good.
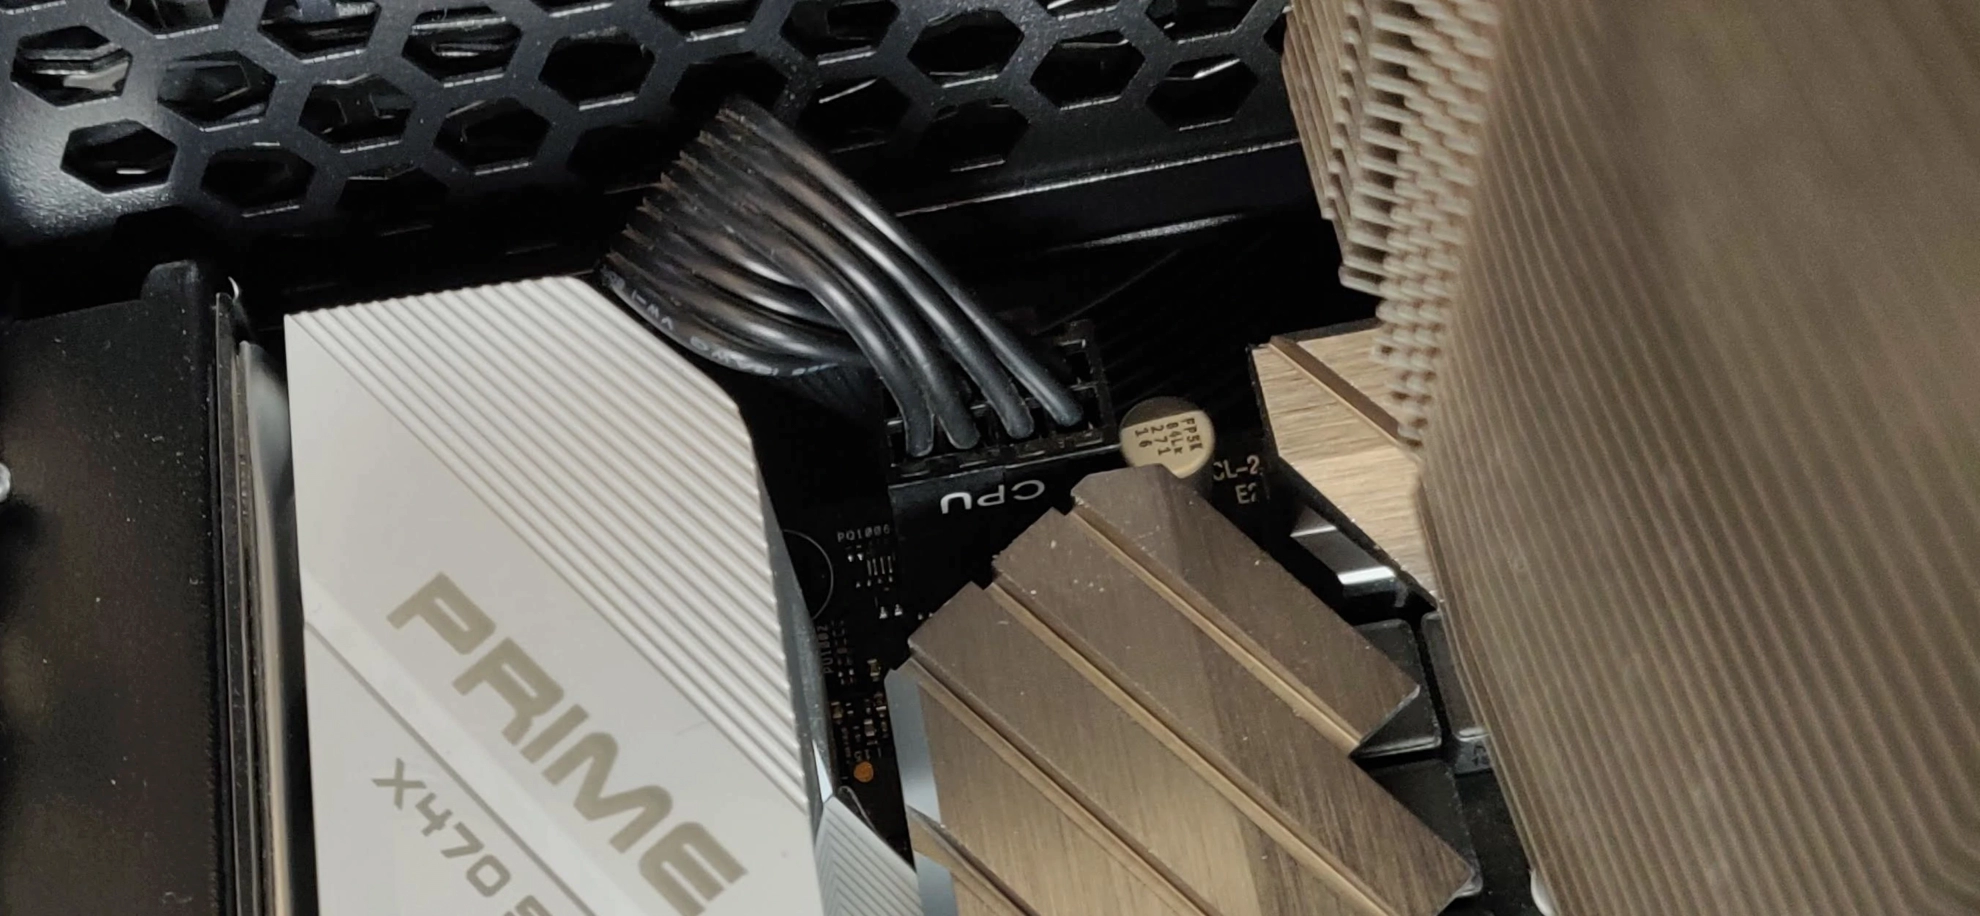
When the ATX board is screwed in, you can already see that there is not much space left around it. The worst connector was the 8-PIN for the CPU; it's really cramped in that corner.
Speaking of space, the manual shows an example of an ATX build in which they added 2x 140 mm fans at the bottom.
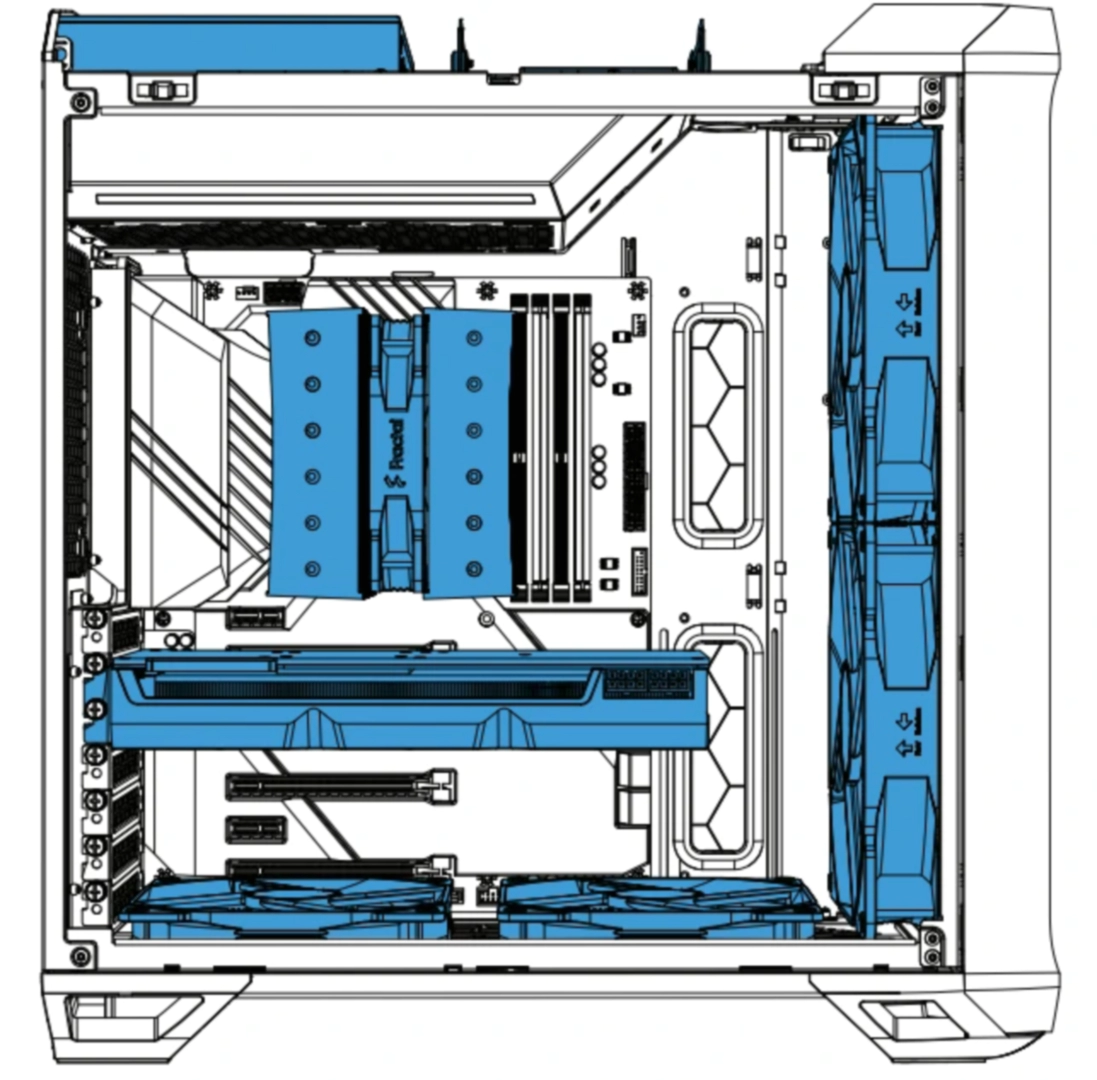
I claim this is not really possible if you have any kind of USB/Audio/I/O header there, because I would not be comfortable bending the cables so close to the port. In my opinion, that would put too much stress on them.
Here, I used only a 120 mm fan as an example, and even this will not really fit if I had to screw it in at the specified places—not even mentioning the USB 3.0 header to the right of it. So yeah, I do not know what the idea would be here. Just not connect anything?
Besides that, the CPU cooler clearance is around 174 mm, which in my case is a tight fit. However, I could also lower the first fan a bit and set it on top of the RAM, so it would not even touch the side panel. So, no problems here.
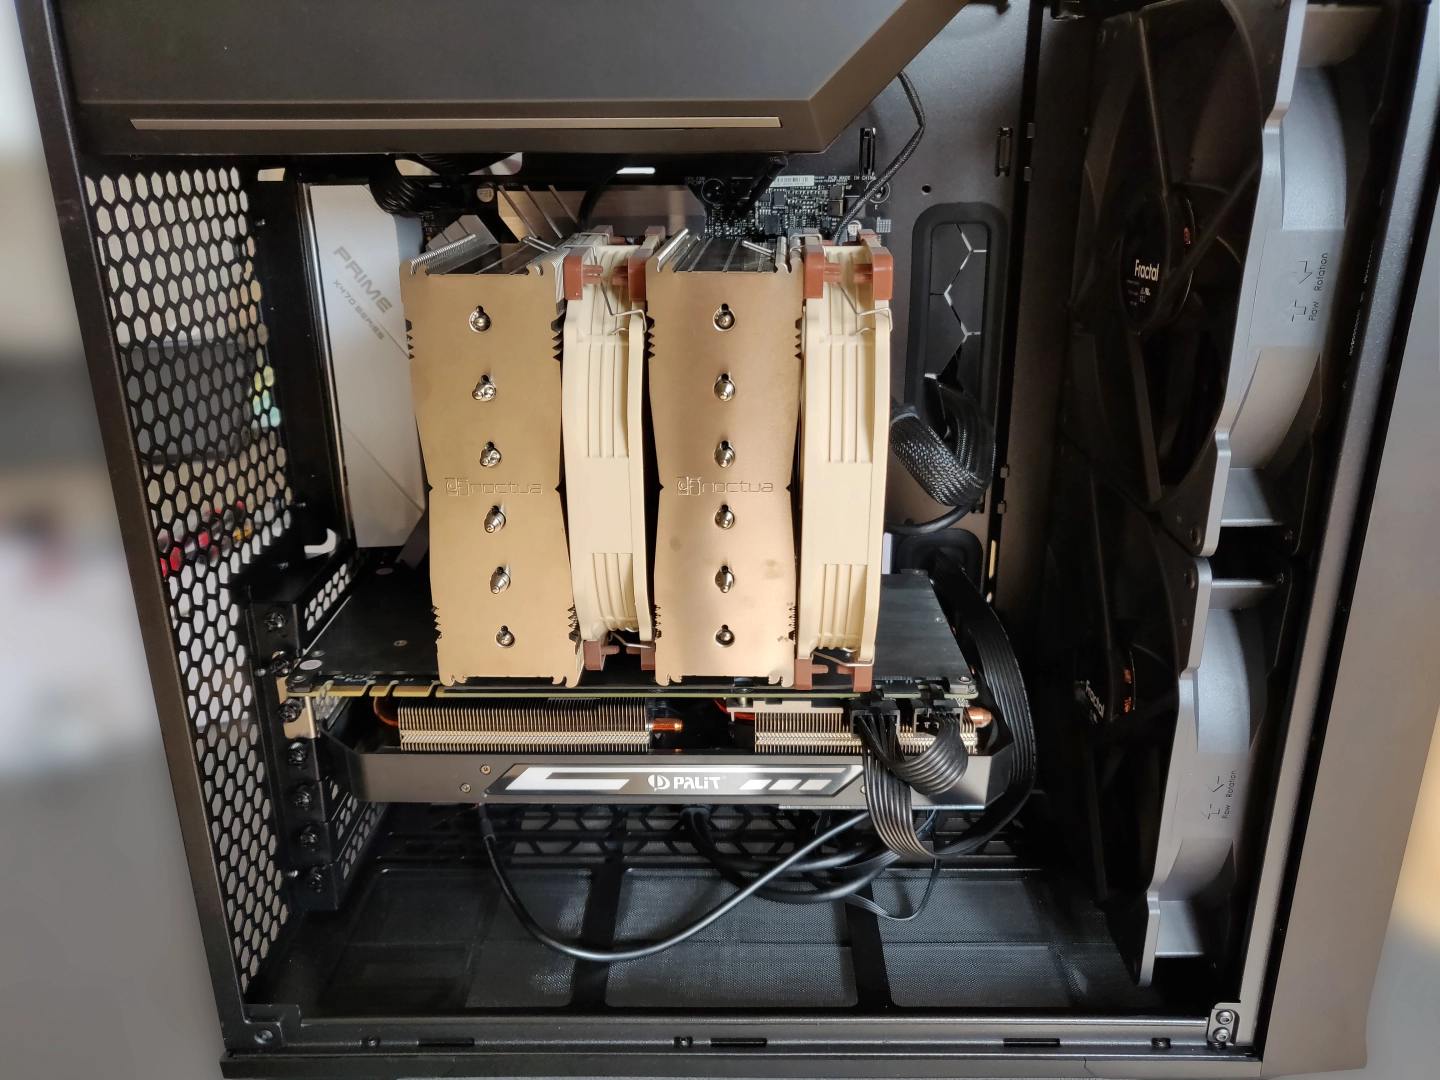
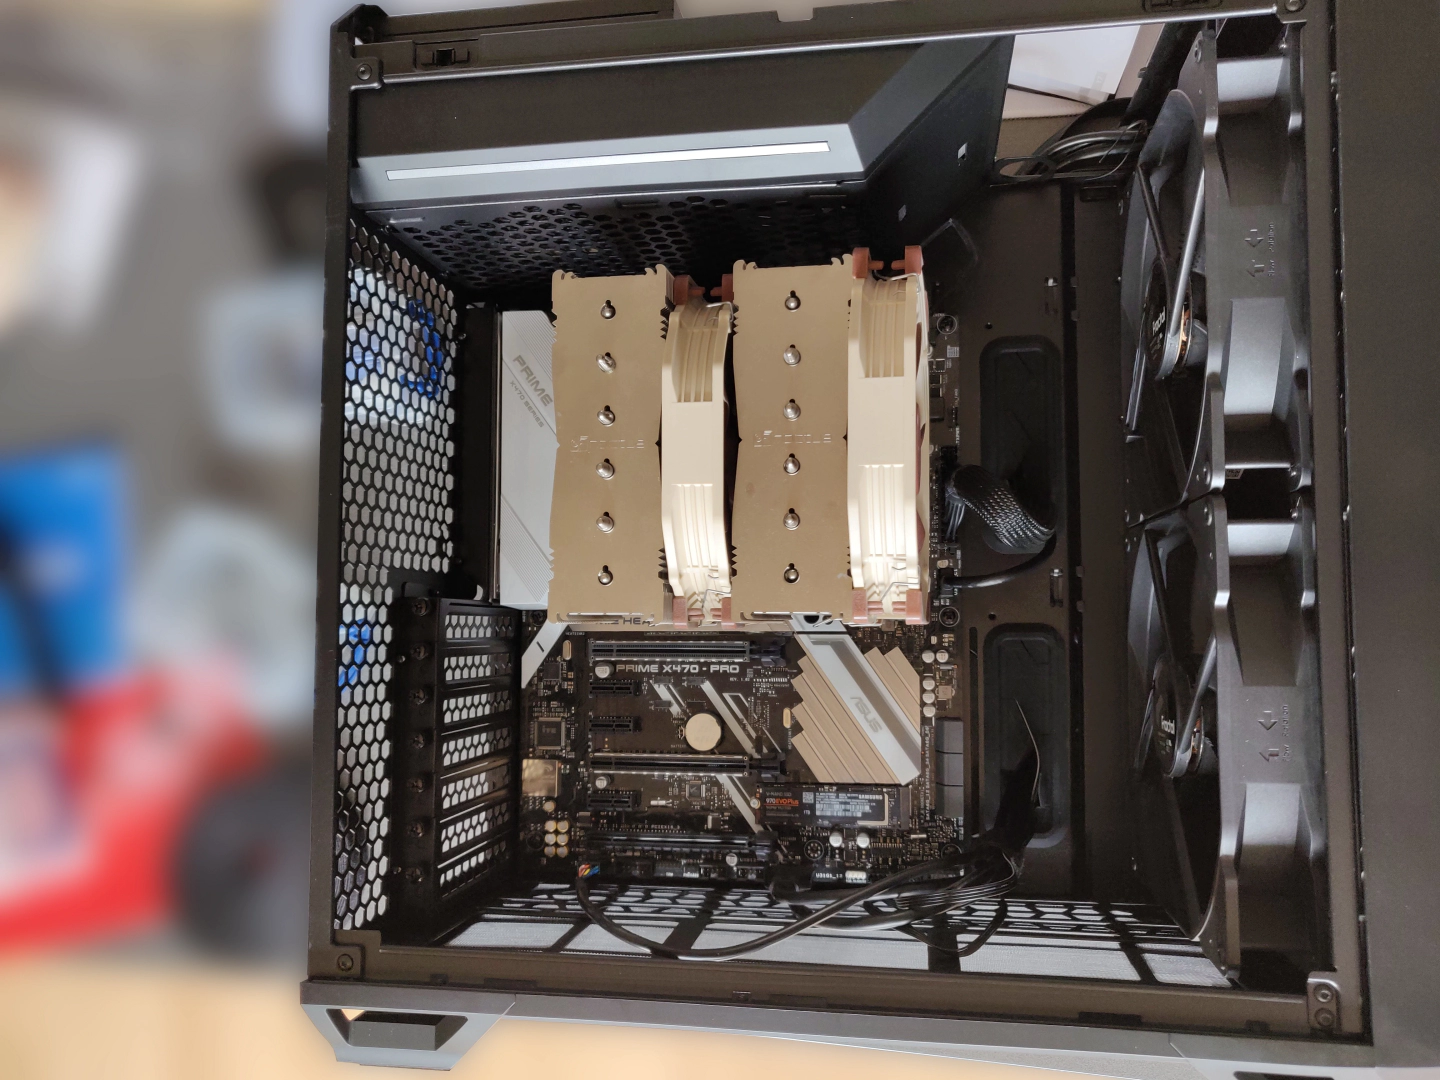
Quick look with everything connected. I'm thinking about adding a 120 mm exhaust fan just to help out the CPU cooler a bit, even though with this much positive air pressure, it is not really needed. I even managed to squeeze a 140 mm fan in there, but it was only held in by friction. Also, the blades were then hitting the inside of the fan frame because it got compressed sitting so tightly in there. With a bit of modification, I certainly could shave a bit off the frame and get it to fit.
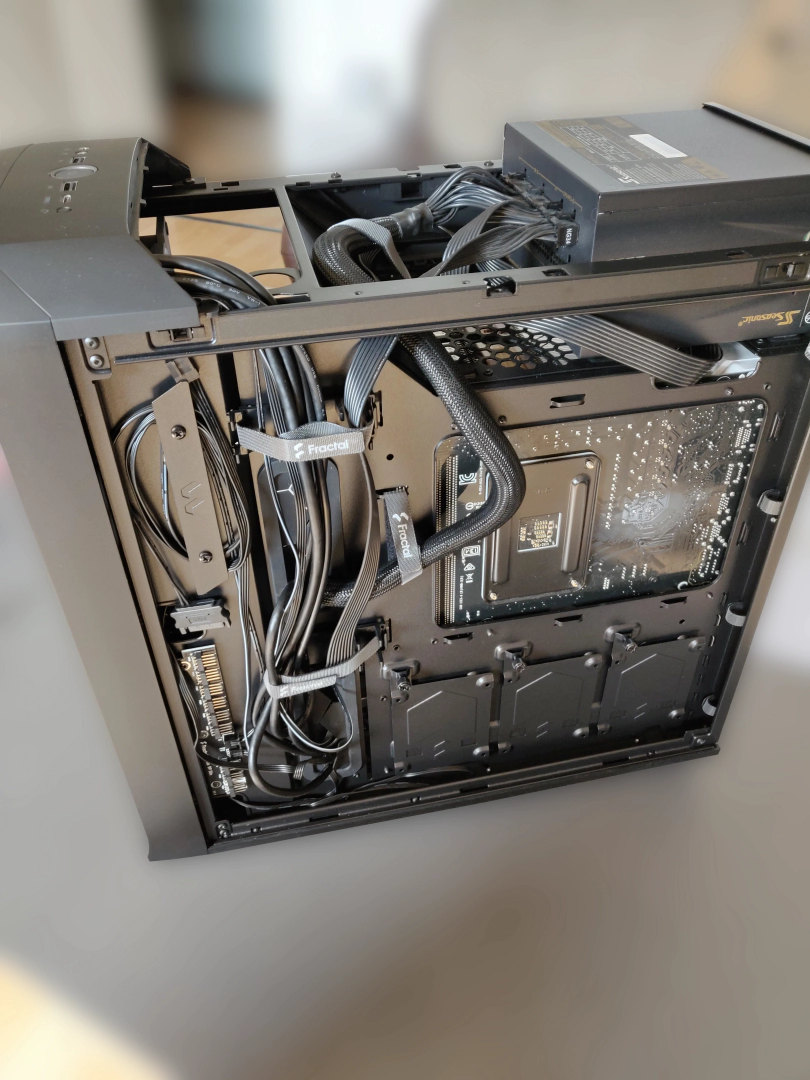
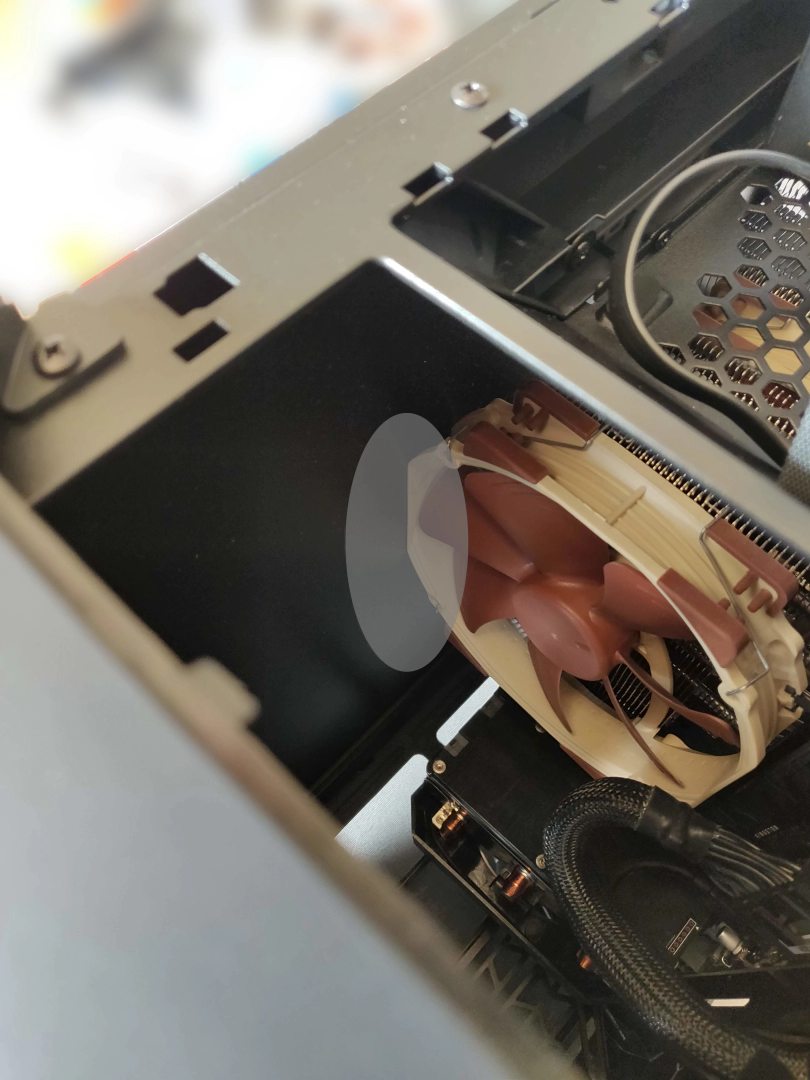
The backside is really cramped. I do not know how you could add anything back here, like an SSD or similar, in these mounts. It's really, really cramped here; even with this setup where I only used the most necessary cables, the panel will pop off if not secured with a screw!
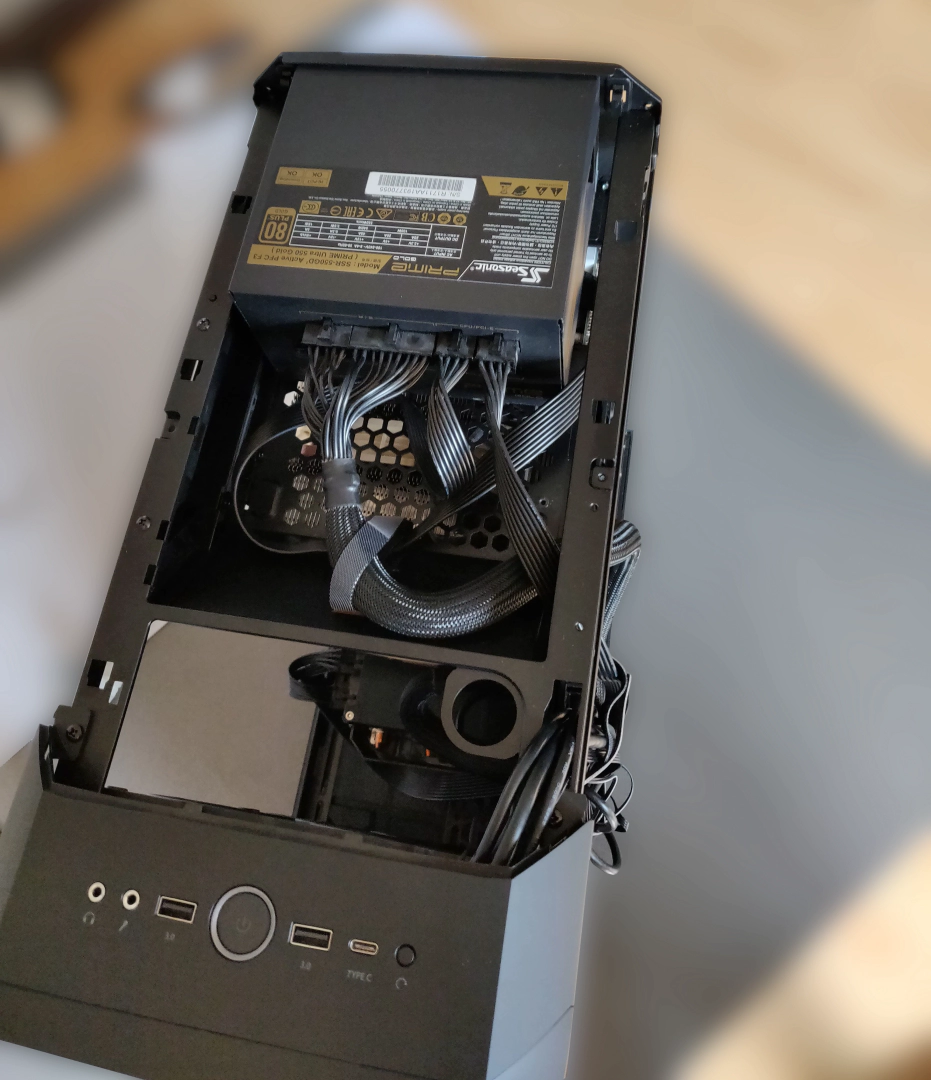
Fitting the PSU, I had no problems. I removed the optional drive cage up there, and all the cables were long enough to reach their destinations. Of course, this is the compact version, and I could foresee cable length problems if you get the full-sized version of this case. This style of top-mounted PSU case was largely replaced by bottom-mounting, so cable lengths were often designed expecting the PSU to be at the bottom of the case in a shroud.
Completed Build
For now, it's done. I'm still thinking about adding that exhaust fan. Also, now the software side begins: finding good fan curves, making sure that the CPU and RAM are working, and maybe—but only maybe—upgrading to a bigger GPU in the future.
Random Notes
GPU fan adapter
- CRJ 4-Pin PWM GPU Fan Adapter Cable |---| GELID Silent PWM Fan Adaptor
- CRJ 4-Pin PWM GPU Dual Fan Splitter |---|
This would be useful if the fans on my GPU die, either by trying to get replacement fans from AliExpress or by connecting normal fans.
What GPU to buy?
Right now, I would probably settle on an RX 6800XT, which seems to be the best compromise for me.
| GPU | MHz Base | Boost | RAM | Price | techpowerup |
|---|---|---|---|---|---|
| RX 6700 XT | --- | --- | --- | --- | --- |
| Sapphire Nitro+ Radeon RX 6700 XT | 2457 | 2622 | 12 | 529€ | TechPowerup |
| RX 6800 XT | --- | --- | --- | --- | --- |
| ASRock Radeon RX 6800 XT Taichi X OC | 1925 | 2360 | 16 | 780€ | TechPowerup |
| Sapphire Nitro+ Radeon RX 6800 XT | 1925 | 2360 | 16 | 817€ | TechPowerup |
| ASRock Radeon RX 6800 XT Phantom Gaming | 1875 | 2310 | 16 | 890€ | TechPowerup |
| RX 6900 XT | --- | --- | --- | --- | --- |
| ASRock Radeon RX 6900 XT Phantom Gaming | 1925 | 2340 | 16 | 895€ | TechPowerup |
| Sapphire Nitro+ Radeon RX 6900 XT SE | 1950 | 2365 | 16 | 940€ | TechPowerup |
| PowerColor Radeon RX 6900 XT Red Devil | 1925 | 2340 | 16 | 999€ | TechPowerup |
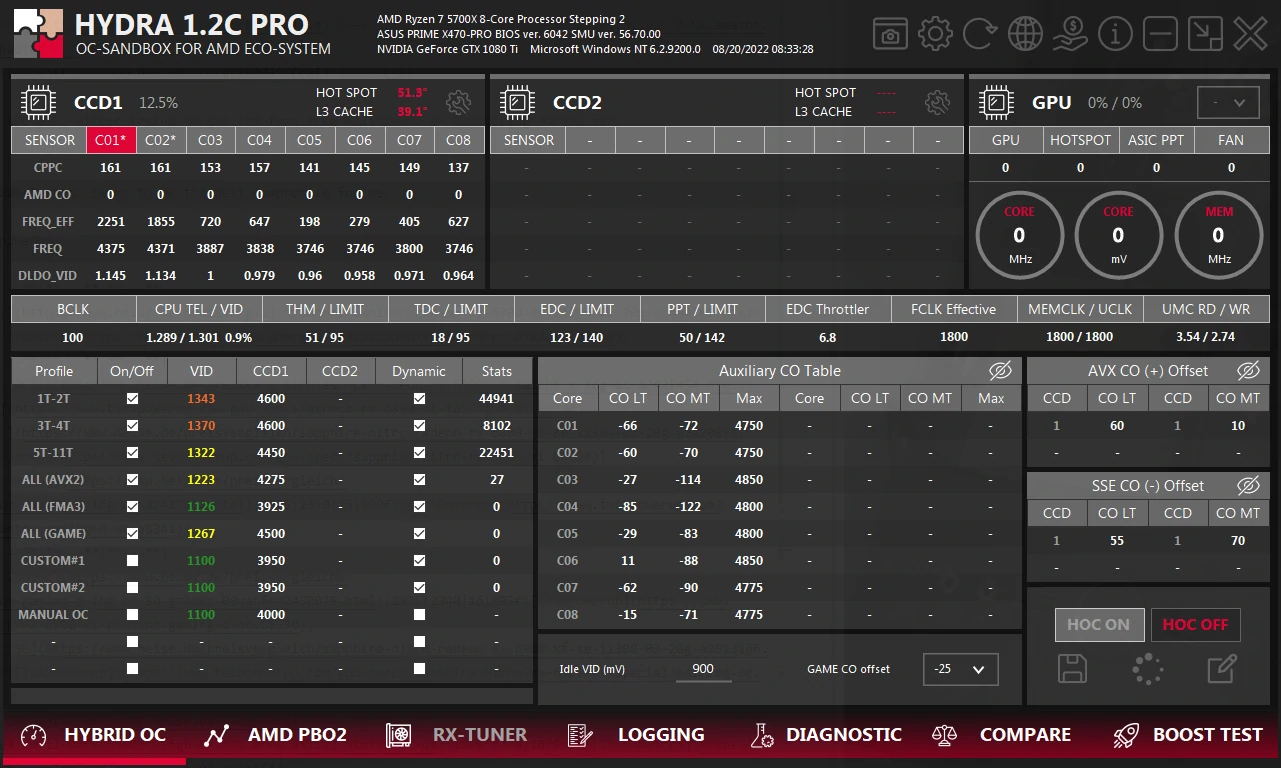
Trying out Hydra OC
Trying out Fan Control GitHub
